Tuesday, July 26, 2011

Mario vs Sonic Birthday Party!

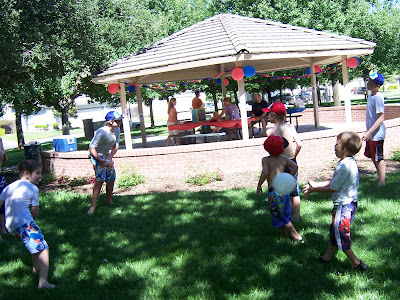
My oldest kiddo celebrated his 6th birthday last month (sniff sniff)! Man he's growing up fast! Jonathan loves Mario and Sonic, so we decided the theme would be Mario and Sonic at the Water Olympics.

When the kids first arrived, they got to choose whether they were going to be team Mario or team Sonic by picking a hat.

I shared how I made the hats HERE

Next came the games. I initially thought we would have Team Sonic compete against Team Mario. But a couple of the boys weren't able to come, so we had more kids on Team Sonic. We just divided them into two teams, and they all still had fun.
Our first game was the Mario vs Sonic Relay Race. I just got a couple of containers, filled them with water, and then had the kids race to fill the smaller container with water by using a shovel. It was a really simple game, but the kids had fun.

For the next game we did an obstacle course. They started out by spinning around a bat 5 times, just to get them dizzy!
Then they had to climb through a tunnel, which proved to be almost impossible for the older boys!
Then they had to sit in a pool of water

My husband and little munckin getting in on the fun


Last they had to do a hurdle over a stick. I wish I could have found something different for them to jump over, but this was what I had! And the kids don't care if it looks goofy!

Next we played Get the Goomba

This game was fun, but was ruined by the crummy water guns I bought. They were only $1 at Walmart, and I thought I scored! Then we went to use them, and they didn't really even work. So this game was short-lived, but it could have been really fun.

For the last game we did a Yoshi Egg Toss. I got white balloons, and Jacki colored green spots on them so they looked like Yoshi eggs. Of course I didn't get a picture of the egg balloons, but you get the idea! I would also recommend you get water balloons for this. I couldn't find any white water balloons, so I used regular balloons, and they wouldn't pop!

After the games, we had cupcakes and ice cream cups
I just printed the Mario and Sonic pictures onto cardstock, and then Jacki punched them out with a circle punch, and did a coordinating scallop punch to back it. I love how these turned out, and they were so much easier than making a cake and having to bring plates and utensils. I also didn't want to make a cake because last year I made this cake for Jonathan for his 5th birthday

Ok, back to the party!!


We ended the party by awarding each of the kids with a gold medal and a bag of treats. Again, I don't have a picture of the goody bags, but I just bought red and blue goody bags from Walmart, and stuffed them with junk. I found Mario Kart memo pads and stickers at Party city, and I bought Mario Kart fruit snacks from the grocery store. The rest of the goodies were just generic water party gifts like water bombs, mini water guns, and more treats. This party ended up being so fun, even though quite a few of the kids weren't able to come. Now I'm just hoping my son likes something other than Mario or Sonic next year!

Thanks for reading!!
Juli

Linking to THESE fabulous parties!

Monday, July 25, 2011

Town Games

We live in a super small town (like 300 people) and my husband is on the town board, so that makes us in charge of the annual Pioneer Days kids games. It is a free carnival that the town puts on every year.  We have little kid races and it is quite the event.
  We needed new games made this year so with the help of my builder husband, we got the job done.

1st game, the Darts:  The old one was a piece of  wood, that you couldn't even stick the pins in.  So when we went to buy actual cork, they didn't have any.  We decided that sound barrier would do the trick and it was great for this year (I think I will still try to find some cork , the dart board took a lot of damage).  It was fun to paint, but then I noticed that it was scratching off of the shiny surface too easy, so I mod podged it.  And I duct taped the edges to keep them from getting damaged too.

 My two little boys helped paint on the stars with the round sponge paint brushes, they had a blast.
Here it is with the balloons.
 2nd game, the Ring Toss: We didn't have one, we had a stupid sucker pull, so I got rid of that and replaced it with a good old fashion Ring Toss.  I couldn't find any to buy so I made my rings out of water pipe and duct tape.  They worked great!
 The actual board was a peg board we bought for $3 and the pegs are from a display for some custom draws, that they gave us for free!  We glued them in and Walaa.

3rd game, Spill the milk:  Or if you forget and rename it (like me) Milk Bottle Knock Out.  Some boys get a little too rambunctious while playing this game and we needed something sturdy to handle it.  So my hubby built this wonderful stand and I painted it.


4th game, the Fish Pond:  The old one was the heaviest three pieces of wood they could find, I'm sure.  Everyone thought it was going to fall on a child and kill them, so we needed to remedy the problem.  I bought 5 yrds of fishy fabric, cut it in half and sewed it together to be wider and then sewed a loop in the top and sides, to fit the pvc frame.  Now we have the lightest fish pond that kept trying to fly away in the wind.


 5th game, the Bean Bag Toss:  I am super proud of this one because I cut out the holes all by myself!  Then I painted a garden, I'm not a great artist but I think it turned out pretty good.  I had to get some help for the bottom blue flower and the purple rose, because the rest had taken me hours and my creative juices were failing me so I am glad a friend came to help.    "sorry picture unavailable at the moment"


6th game, the Duck Pond:  This game replaced the saw dust game, where they search in the saw dust for a prize, I never quite figured out if I should hide small prizes or if I should hide different balls and they correspond with a prize, or what, so I replaced it with the Duck Pond.  I didn't get a picture of ours, but it looked a little like this, with a blue pool and 4 dozen ducks.  I just used a sharpie to draw a circle or a star for different prizes.

Last Game, The Ping Pong Pond:  Of course I didn't get a picture of this either, but you get the point with this picture.  Ours just has a few more and a blue pool.

It turned out to be a great day and I am definitely glad it is over!  I plan for 100 kids (so 700 prizes) and we usually have left over prizes, but this year we ran out.  Luckily no one got mad. (hey no one can complain with Free)


Jess

Tuesday, July 19, 2011

Mario and Sonic Hats

Hello there!!  Thanks for stopping by!
My son turned 6 at the end of last month, and he was very adamant that he wanted a Mario and Sonic Party.  We decided the theme would be Mario and Sonic at the Olympic Games.  As one of the favors, I made hats for each of the kids.  
Thanks to my adorable models!! :)
When they arrived at the party, the kids got to choose whether they wanted to be Team Mario or Team Sonic by picking a hat.  I already had experience making the Mario hat, because 2 years ago for halloween, my son was Mario and my husband was Luigi.
Awesome, right?! :)  Super cheesy, but it was cheap, easy, and doable!! And it was a lot better than paying $40 for the costumes at the store!

So anyway!!  I started out by searching all the thrift stores in our area for red and blue hats.  I was planning for 10-15 kids to be at the party, so I couldn't afford to pay $7 for a plain blue or red hat from Walmart.  I ended up paying $3 for most of the hats at the thrift store, but some of them were only $1.  The hats started out like this

First I cut a piece of white felt big enough to cover the stuff on the front of the hat

I glued the top of the felt onto the hat first, and then moved down.  On most of the hats I had to trim some of the felt where it met the brim of the hat so it wouldn't bunch.  Once that was done, I worked on cutting out the M's and Sonic's.  The Sonic was a pain, and I still think it looks a little goofy, but the kids knew what it was and didn't seem to mind!

I'm not sure why I didn't draw in the eyes on Sonic for the pictures, but oh well.  You get the general idea!  All the kids loved their hats, and were so excited that they got to take them home.
What do you think?
Check back next week when I post about the actual Mario vs Sonic at the Olympic Games party! (wow, that's a mouthful!)
Thanks for reading!
Juli

Linking to THESE fabulous parties!!

Thursday, July 14, 2011

Camp Crafts

Life has been slightly busy around my house lately.
Right now I am at Girls Camp for church and I'm loving it.
I am helping with Camp Crafts, which I feel is right up my alley.
I thought I would show you what we're going to be doing,
in case you want to use some of the ideas for your family or your ward.

The main craft I'm in charge of, I found over at The How-To Gal.

I love these felt flowers and they are SO easy to make.
I also made it so you can switch it from a headband to a clip.
I know the girls are going to enjoy it.
Some tips I have, since I am making these for about 100 girls.

*Get a white stamp pad for the color felt and a black stamp pad for the white felt.
I ended up using a Rubbermaid bowl as a stencil and just stamped directly on the felt.
It makes for easier cutting and just saves TONS of time!

* When cutting the base, I found a Triangle with the corners cut off works really well.

*If you want a flower that doesn't stand up really high on your head,
don't cut your flower so thick.

Other crafts we're doing.
Duct Tape Wallets
Totes (but we're using regular material)
Washer Necklaces And Camp Journals
Paracord Bracelet (we're just going to knot them though)

There you have it.
Hope you are having a great summer and that you can use some of these ideas.
See you when I get home from camp!

Wednesday, July 13, 2011

{LPS Fabric House}


Here's the LPS (Littlest Pet Shop) House I made for my little girl. She loves it!!
There's even handles at the top so it can be carried around.

I came across a tutorial from UK Lass in US

Wish I was creative enough to come up with my own ideas.....for now I am just grateful that others are and are willing to share their ideas and tutorials with all of us!!!


Tuesday, July 12, 2011

Birdcage Bridal Veil with Silk Flower

Hello there!! I'm so happy to finally have my laptop with all my pictures working again!! Yahoo! Thank you to my amazing husband and our friend Tim from PC Custodian for fixing it!


This last month, my good friend Natasha renewed her vows with her husband. I was so honored that she asked me to make a bridal headpiece for the special occasion.
Here's what I came up with


Tash wanted a veil, but not the traditional bridal veil. So we went with a vintage birdcage veil that only covered part of her face, and I just love it! Do you want to see how I made it?!

So, I started out with the flower, since that's something I've done before. I followed the same steps for the flowers I made in this post, except I only used satin for the layers.


Next came the part that gave me hives! I've never made any kind of veil, or used netting before, so this part was all new to me! I bought the netting from Joanns, and just sat in front of the mirror for hours trying to figure out how to do the veil.


I got it the way I wanted it, glued it to itself first, and then I glued the netting to the
bottom side of a round piece of felt


On top of the felt I glued a couple feathers that I thought made it seem elegant.
Then I glued the flower on top of the feathers.


On the back of the headpiece I glued another circle of felt. I cut two slits in it before I glued it on so she can use different clips or even a headband if she wants.


What do you think?! I love how it turned out, and she looked absolutely beautiful!!
Thank you Tash for giving me the opportunity to try something new!

Thanks for reading!!
Juli

Linking to these fabulous parties!!

LinkWithin

Related Posts Plugin for WordPress, Blogger...