Friday, April 29, 2011

KITCHEN IMPROVEMENT

KITCHEN IMPROVEMENT

This was what I wanted to do for Home Improvement Week,
but am glad I got my bathroom cupboard done.
This week, I've gone back to sewing to help improve my kitchen.
I've crocheted a lot of towel toppers, and found really cute ones to sew.

Sorry this first picture is a little dark, but it is a towel topper for May.
There are some darling ones for each month and season of the year.
If I had left an inch on the bottom, I could have used snap tape to snap the towel on,
but this one I will put some elastic on the back and then just slide a towel through it.

Next, I decided to make a magnet, tower holder,
clock trio for my kitchen. For the frig magnet,
you can use any of these kinds of magnets. Just
hot glue it on the back, or use some of the magnets
that are sticky on one side.

This magnet says: 'Bless This Home'.


This tower holder is darling. It's a little more
detailed than the magnet, but the same theme.
I got some snap tape to sew across the bottom,
right under the picture. Then you cut a dishtowel
in half, hem the raw edge, gather it and attach
the other side of the snap tape to it. Then you
just snap the towel on and sew a button on the
back and your towel is ready. This way you can
have several towels and just unsnap one to be
washed, and snap on another.


Next I took an old clock that I had on the wall
and decided to change it to match the magnet
and the towel holder. If you don't have a spare
clock, you can get one either at D.I. or Walmart
for not very much money.


I embroidered the clock face on some muslin
backed with a thick cut-away stabilizer.
It turned out really cute.


Next, I took off the cover of the clock and
centered it over the clock face.


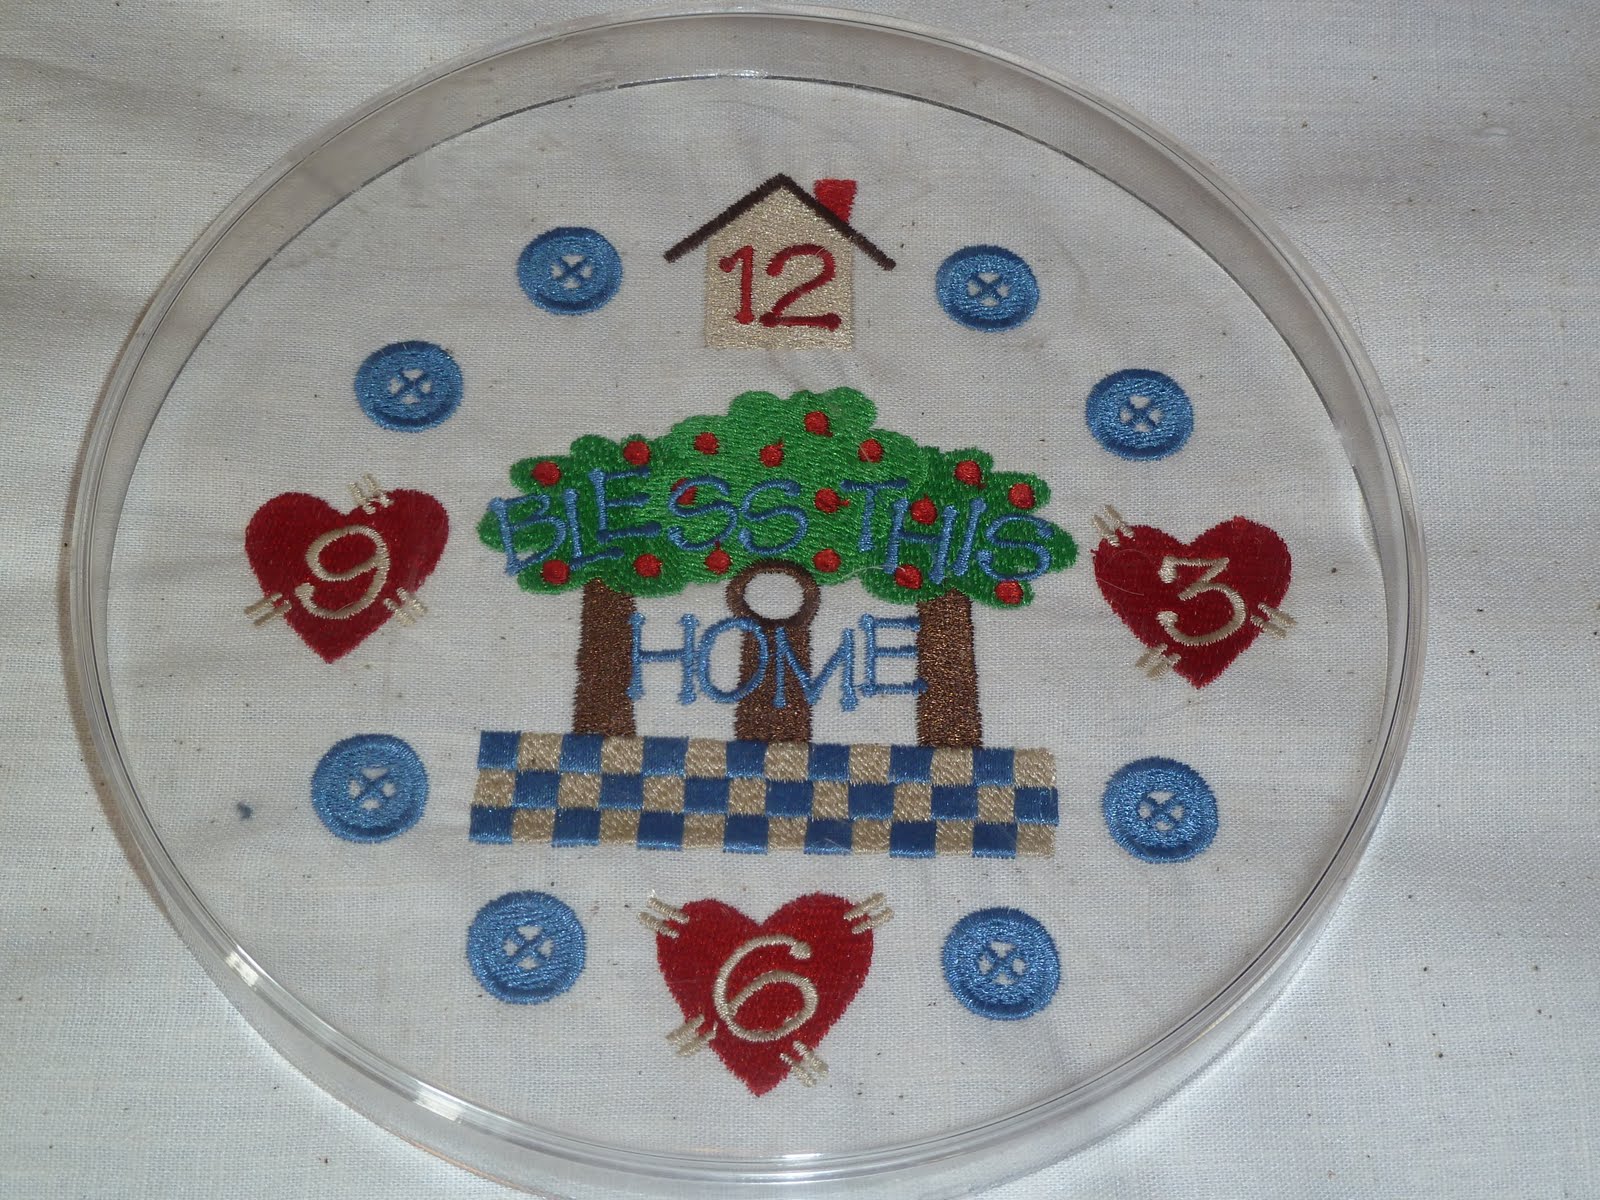
Draw a line around the cover so the design
is the same size as the original clock.
Carefully trim around the circle.
If there are any puckered spots, just
cut the stabilizer in the back and it
lays right down.


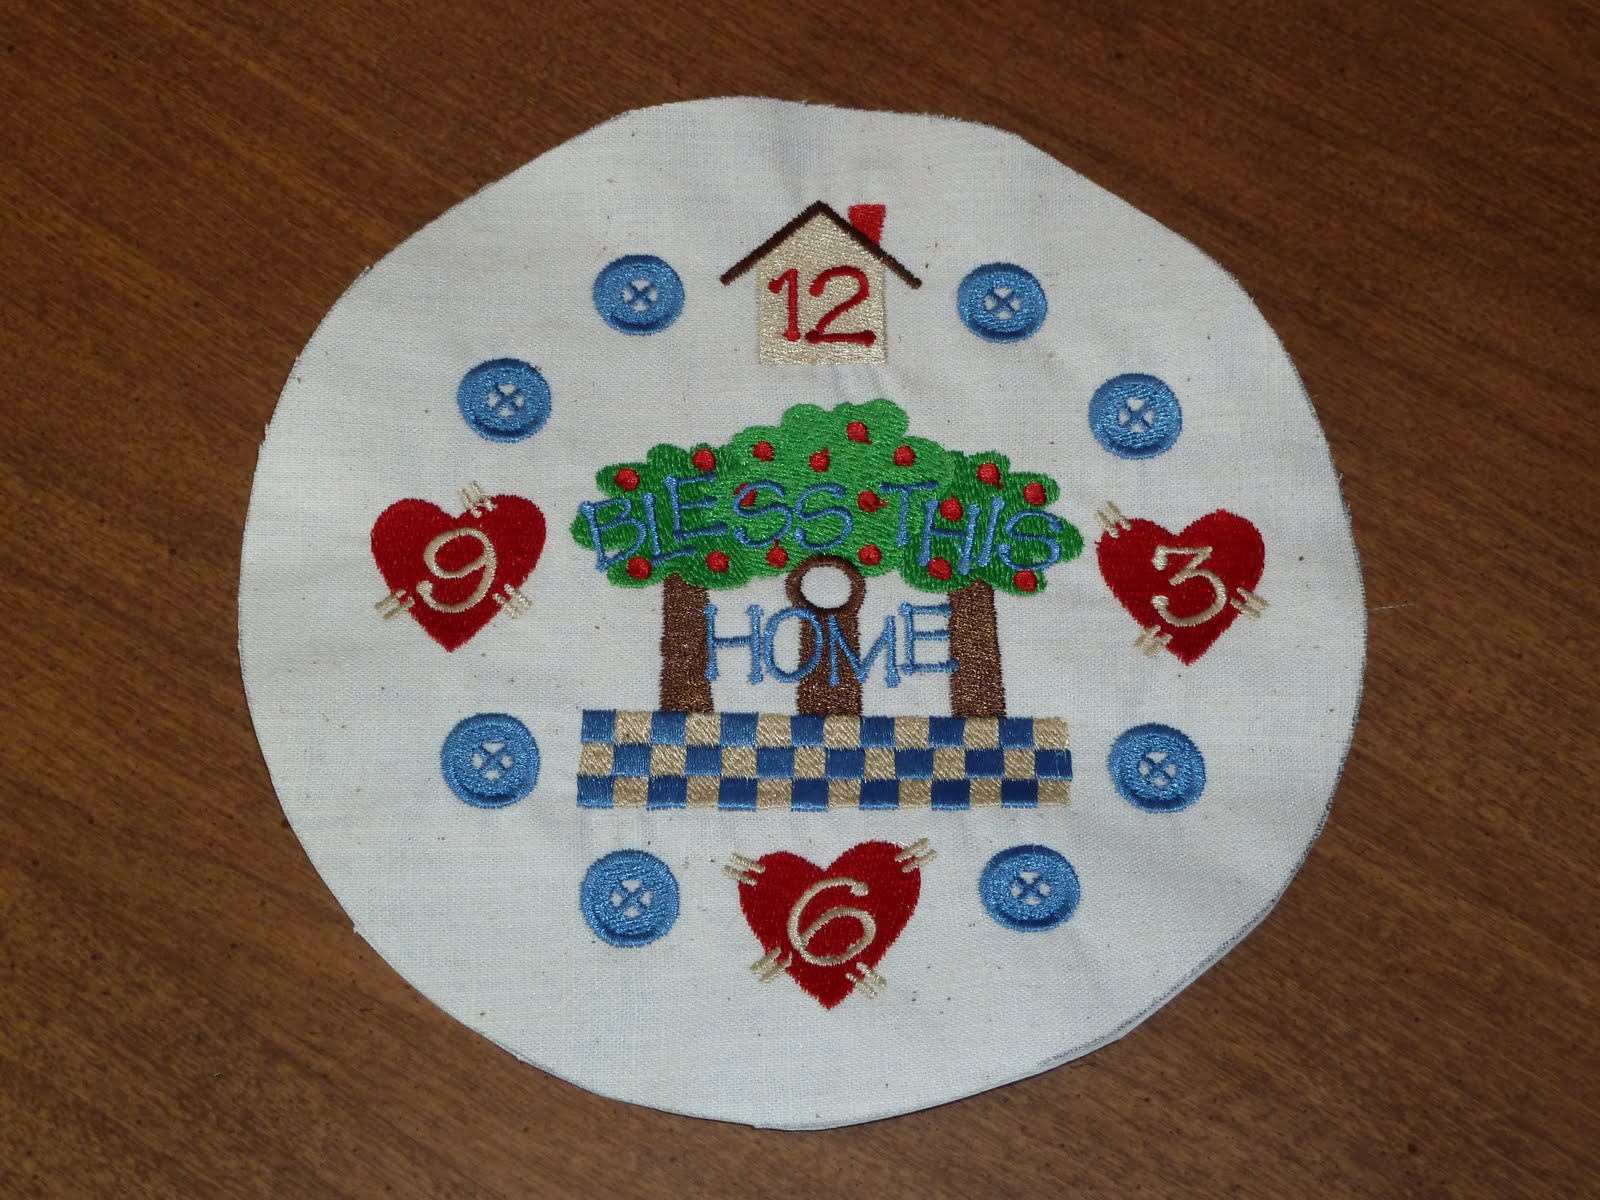
This is the clock face all cut out. I then
sprayed fabric glue around the outside of
the clock face between the stabilizer and
muslin and pressed it down so it all lays flat.
Now, cut the hole in the middle to put the
hands through to the front.


I glued the fabric to the back side of the original picture.
It took a little work, but I got everything put back in place.
Here's my new matching clock
If I ever want to change it back to the cow picture,
I would just need to turn the picture back around.

Hope you enjoyed this.
You could come up with a lot of creative things to do with the clock.
I'd like to know what other ideas you've come up with.


We are in Reno, Nevada doing Cinco de Mayo, and Elk Grove, CA doing the Western Festival with our 'Texas Twister Drinks'!
If any of our readers are in the area and mention the blog I'll give you a great deal on our delicious drink!!
HAVE A GREAT WEEKEND!!
I'm loving all these other blogs! Great Job!!
Bye for now! Mother Hen - Barbara

Linking to
Funky Polkadot Giraffe

Wednesday, April 27, 2011

{Criss Cross}

here is my newest quilt that i LOVE
i love the pattern, i love the colors, i just love how it turned out

i was browsing around some quilting blogs and came across THIS and knew that it would be perfect for some fabric that i had been collecting

they called theirs "liberated cross"
i call mine {criss cross}

oh and here's the back


Tuesday, April 26, 2011

A Princess Pamper Party!

This last weekend we celebrated my sweet daughters 4th birthday!
(my, how time has flown!)


She was very specific with what she wanted, which actually made things a bit easier! :) She wanted to paint nails, wear makeup, and dress up like a princess. So that's just what we did. When the girls arrived, I handed them each a purse that I made for them. Do you remember this post? Well, I made 7 more of those sweet little purses, and the girls loved them!! I gave the purses to them at the beginning, because as they went to each activity, they got something to put in their purse and take home with them.
For the first activity they had the choice to either make a necklace or color a princess picture. I was going to have them make princess crowns, but couldn't find any that were in my budget! They had fun making the necklaces, but I was grateful to have a few ladies there to help, since most of the girls needed help with this.


As they finished with their necklaces, we sent them to have their nails painted. Again, I was so thankful to have awesome friends and family to help out with this!! Once their nails were painted, they got to pick a bottle of their very own polish. I got these at e.l.f. Cosmetics for $.50 a piece. Not bad!! They also got a tube of lip gloss to put in their purses.


After this we let them get dressed up as princesses and played a few games.


For this one they passed the present around to music. When the music stopped, that person got to take off a layer of wrapping paper. Inside the box, Jacki made play makeup for each girl, inspired by Heathers awesome post here! So fun! The girls were excited to have something else to add to their purses!
And last it was time for lunch and cupcakes!
I decided to keep the pink and purple theme going with the food! We had strawberries, purple grapes, pink and purple jello in the shape of 4's, pink strawberry whoppers, purple licorice,pink and white frosted animal cookies, pb&j sandwiches in the shape of crowns, and pink lemonade to drink.


My daughter's favorite princess right now is Rapunzel, and she really wanted a Rapunzel cake. I finally found this tutorial over at Bakerella, and figured I could pull it off!


It didn't quite turn out like I'd expected, but Emily LOVED it! She was super excited! I decided to just make cupcakes for the girls to eat. I found the cute cupcake liners at Joanns for $3. I made the cupcake stand after seeing them all over blogland. I got the three plates and two candle holders from dollar tree. $5 for a gorgeous cupcake stand?? Who could resist!?
Here are the girls (minus 1) with their purses. At the end of the party, they all got bracelets and rings to put in their purses, princess fruit snacks, plus a Rapunzel party bag that Emily HAD to have!


Overall, the party went really well. It was a party that I would have loved when I was a little girl! I think maybe I'm reliving my childhood through my daughter!! :) Happy Birthday sweet Emily!!

Linking to
Todays Creative Blog
Ladybug Blessings
Funky Polkadot Giraffe
Not Just A Housewife
House of Hepworths

Monday, April 25, 2011

Tie-dyed Easter Eggs


I saw this a few years ago here and have wanted to try them, but have cringed every time I go to cut up a tie. But luckily my bro-in-law had a ton of ties he didn't want any more. So this year I took the plunge and did it. I think they turned out awesome. Our Best Bites has some great ideas for everything and I also made their wonderful Cadbury mini egg cookies too this weekend.


Start with a 100% silk tie. DI or Good Will has some really ugly ones, they are best.


Then you wrap the uncooked egg with the good side touching the egg. Try to get as much contact with the egg as possible. When it is the folds that touch it leaves a swirly look(that is still cool) but not the print. Then twist tie or use string to make it tight.


Here are my eggs. I did try tying one at both ends to get the print to look better and I thought it turned out great.


Then you wrap them again in an old sheet or pillow case that you have, and twist tie again.


Then place in pan of water that covers them completely with 1/4 c. of vinegar. And boil for 20 minutes. (Note these are not safe to eat.)


Then let them cool to touch out of the water and unwrap. This is that chain tie I showed you at the beginning. I need to get better at tying them, because that light blue part is where the tie wasn't touching as well.


This is the one I tied at both ends to get a good contact with the egg.


Make sure you go check out Our Best Bites if any of my instructions didn't make any sense. They are great at laying it out for you to understand.

Also...we have a new addition to our house this weekend. Donut is our newest pet/friend. The boys love her.


Hope you all had a great Easter weekend.

Friday, April 22, 2011

HOME IMPROVEMENT WEEK

EMBARRASSMENT TIME!!

I wanted to just sew something cute
for my home improvement blog...
but...
every time I tried to think of what
I wanted to do, my bathroom cupboard
kept haunting me.
YOU CAN SEE WHY!!


Every time I opened the cupboard door,
I'd have to catch what fell out!
Especially the medicine cupboard on top.
I could block the mess out as long
as no one asked for anything!

YOU SAY YOU NEED A BANDAID?
OR
A THERMOMETER?
GOOD LUCK!!


Can you even make out what any of the stuff is
in the bottom?
I'm sure there must be some good things about
being a saver, but I'm having trouble
thinking of them!
I'm sure I have it...I just don't know where it is!


This is from 'just' the top cupboard!!!

How in the world did it all fit in there?


Another view!

How in the world could you
'NOT' find a Bandaid with this
many boxes up there!


I hate to say it, but, we always made fun of Grandmas
Buchanan, ,Uhlman, and Memmott
because everything in their house
was always 'OUTDATED'!
Have you ever heard the phrase 'what goes around,
comes around'?
That is the story of my life!
(Beware, children, what you say about me,
as it will come back to haunt you, too!!)

Outdated meds, etc.

NOW FOR THE BIG TRANSFORMATION!!


Anybody need a bandaid?

Can't find a cough drop when you need it?
Now I can!


What ever will I do being able to find
all these ace bandages, and
gauze wraps?


These things were just too tall to fit in the drawers but
fit nicely in this organizing bin.
I know just where to put it.


No questions where things are now.
Each drawer is labeled for easy searching.


More tall bottles! Easy to see what's in here.


No more guess work here!


When my mother-in-law passed away, we got a lot
of her things. I'm not sure what she was going
to use 4 bags of cotton balls for, but they fit
nicely behind the bins with tall bottles.


Whoa!! What a difference!


Every thing is easily found and thus used!


As much as I would rather sew...this was very
rewarding.
We'd love to hear some of your ideas for
Home Improvement!
I just need to be able to twitch my nose and
have it ALL organized.
Thanks for reading and commenting.
We love it.
Have a great weekend!
Mother Hen - Barbara

LinkWithin

Related Posts Plugin for WordPress, Blogger...